How to Make Cute Gift Tags in Procreate
In this tutorial, we're going to draw these cute sweater shaped gift tags in Procreate - perfect for adding to your presents this holiday season. We'll start with the Symmetry tool to draw our initial sweater sketch, and then move on to the cleaned up linework with the Studio Pen brush, adding all the sweater details like rib trim and stitches. Next, we'll create our sweater pattern fill - which you can do with brushes from the full set, or with the free sample brush. Then I'll show you how to make stitch lettering on the sweater. Lastly, I'll show you three (optional but very cute) bonus steps to finish off the project. All that's left to do is print, cut out, and attach to the gifts you're giving!
Brushes
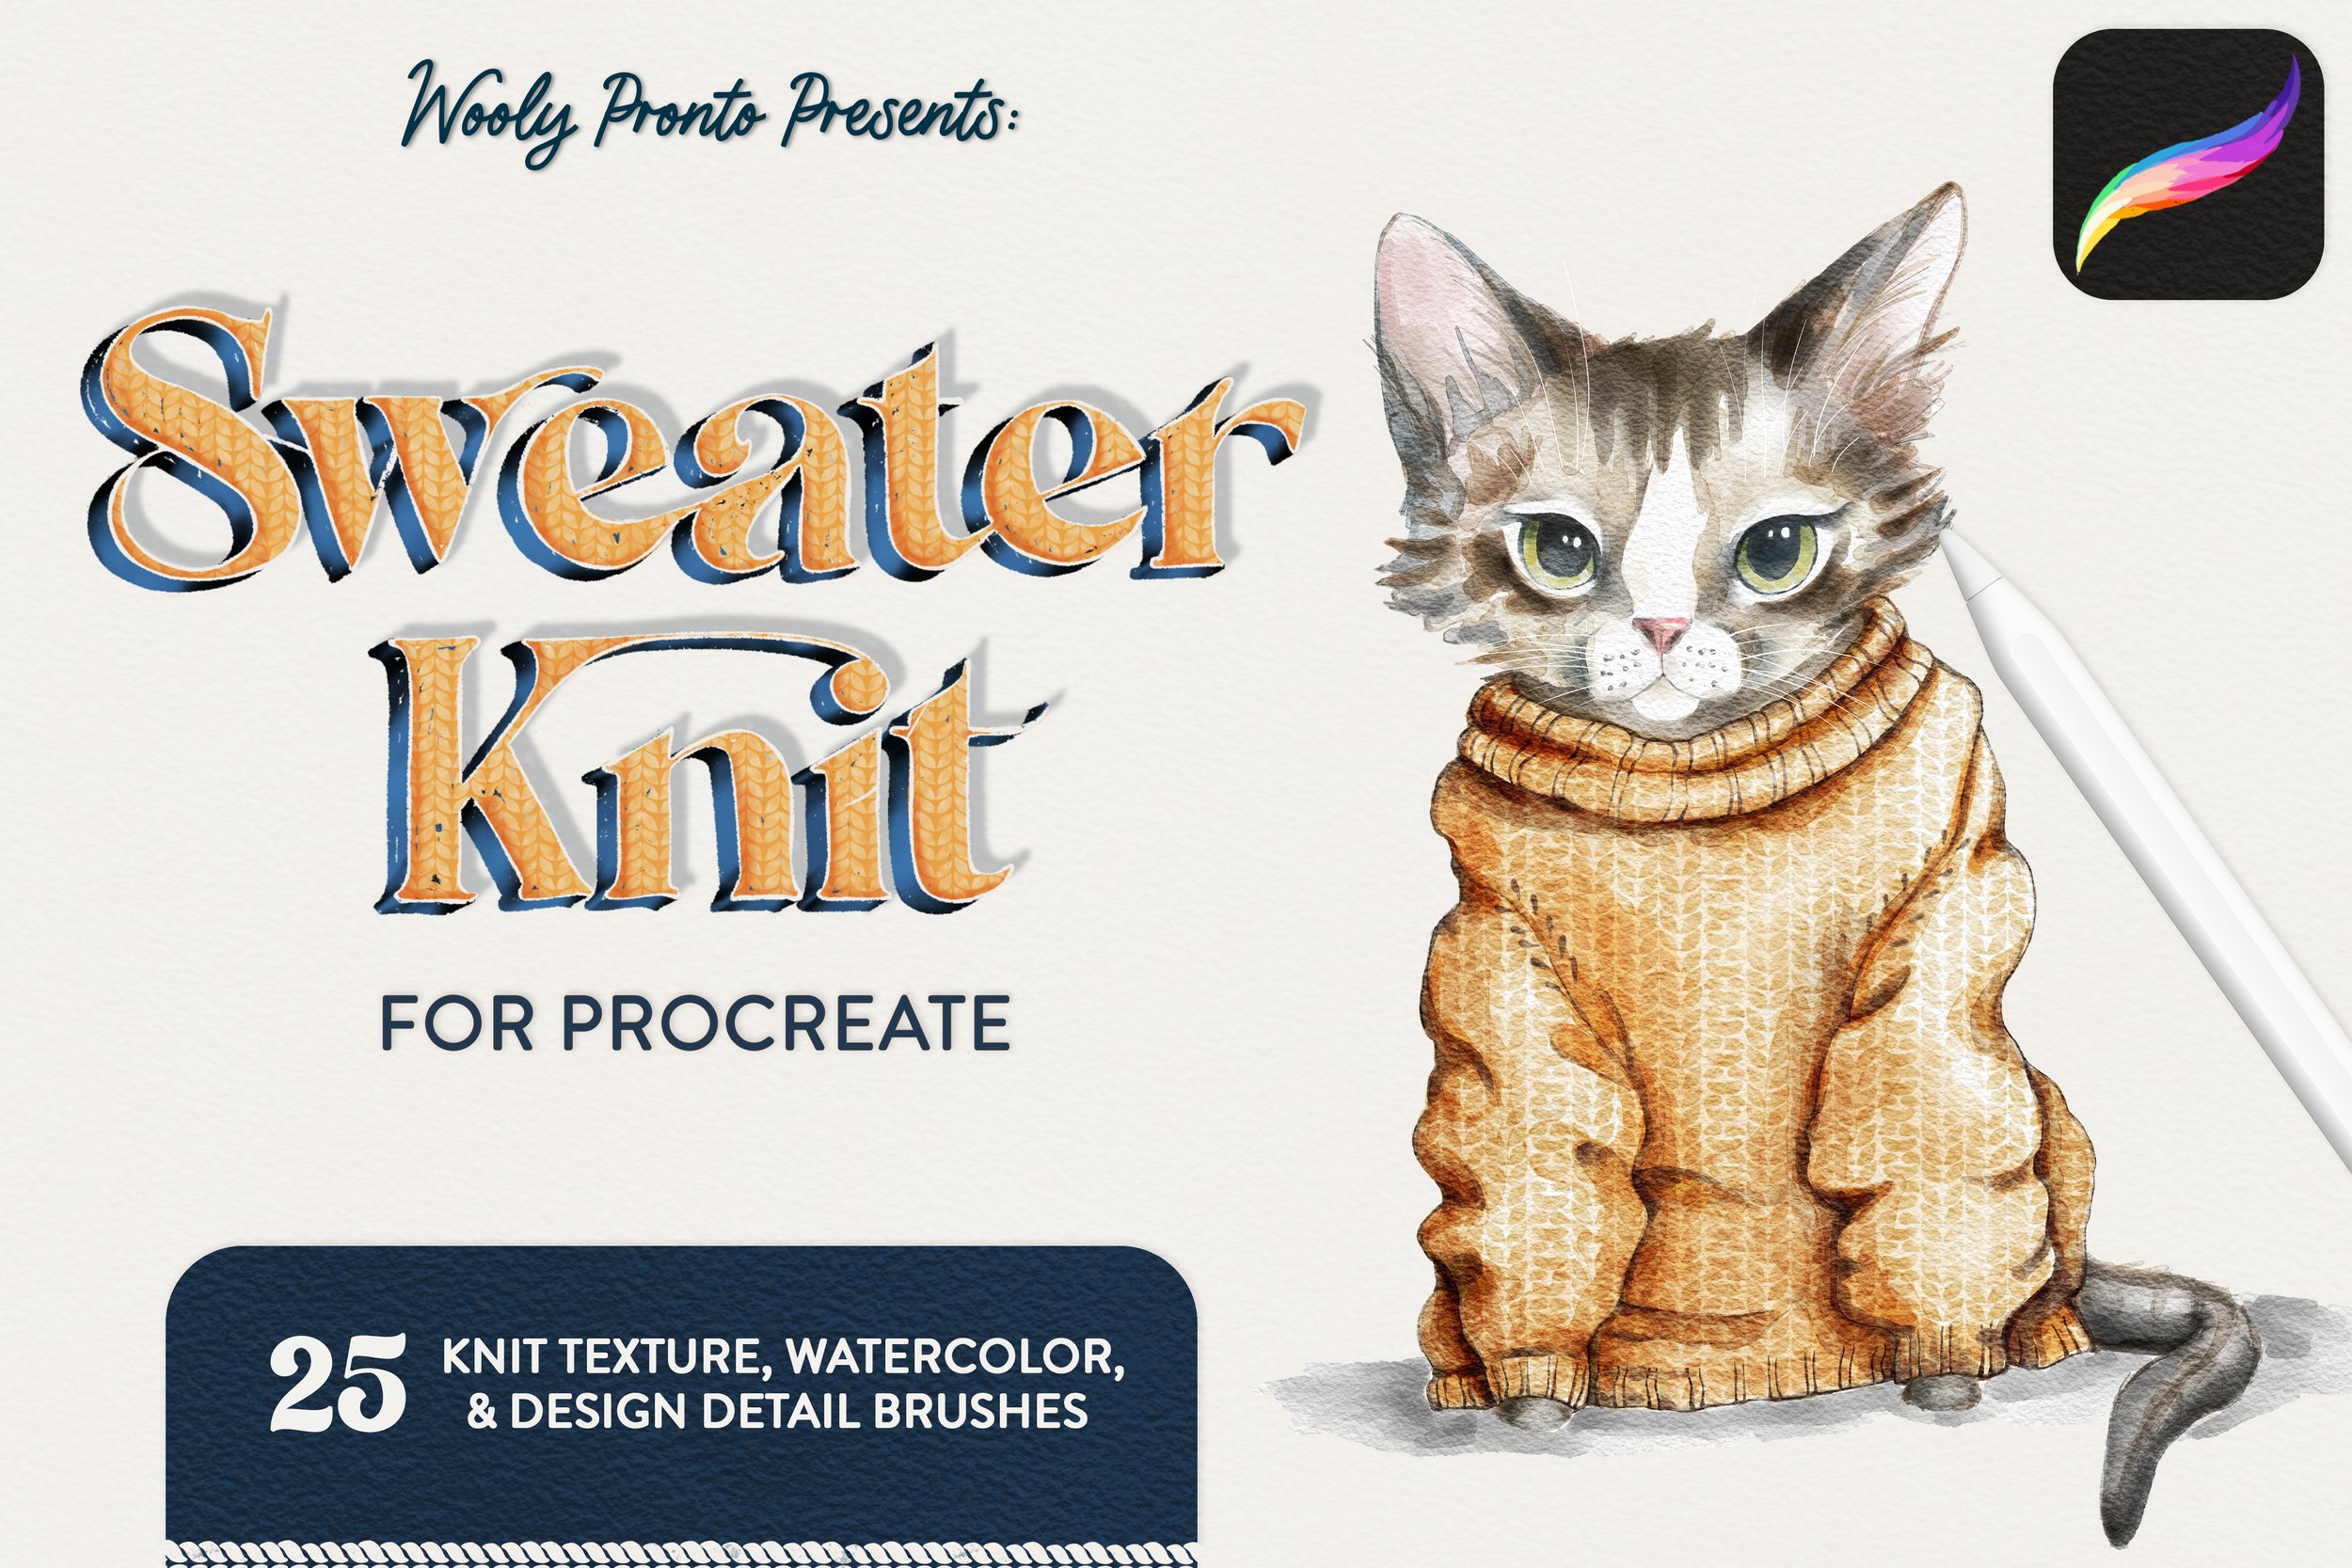
For this project, I’m using watercolor and pattern brushes from the Sweater Knit set. Layer knit texture over watercolor, add cables and colorful stitching details, and create beautiful hand drawn knitwear illustrations.
Free Sweater Knit Brush Sample
Sign up for my newsletter to get access to a free Sweater Knit brush sample from this pack, along with everything in the Resource Library - dozens of free brushes, canvases, and color palettes! Get all the goodies here:
Canvas Set Up
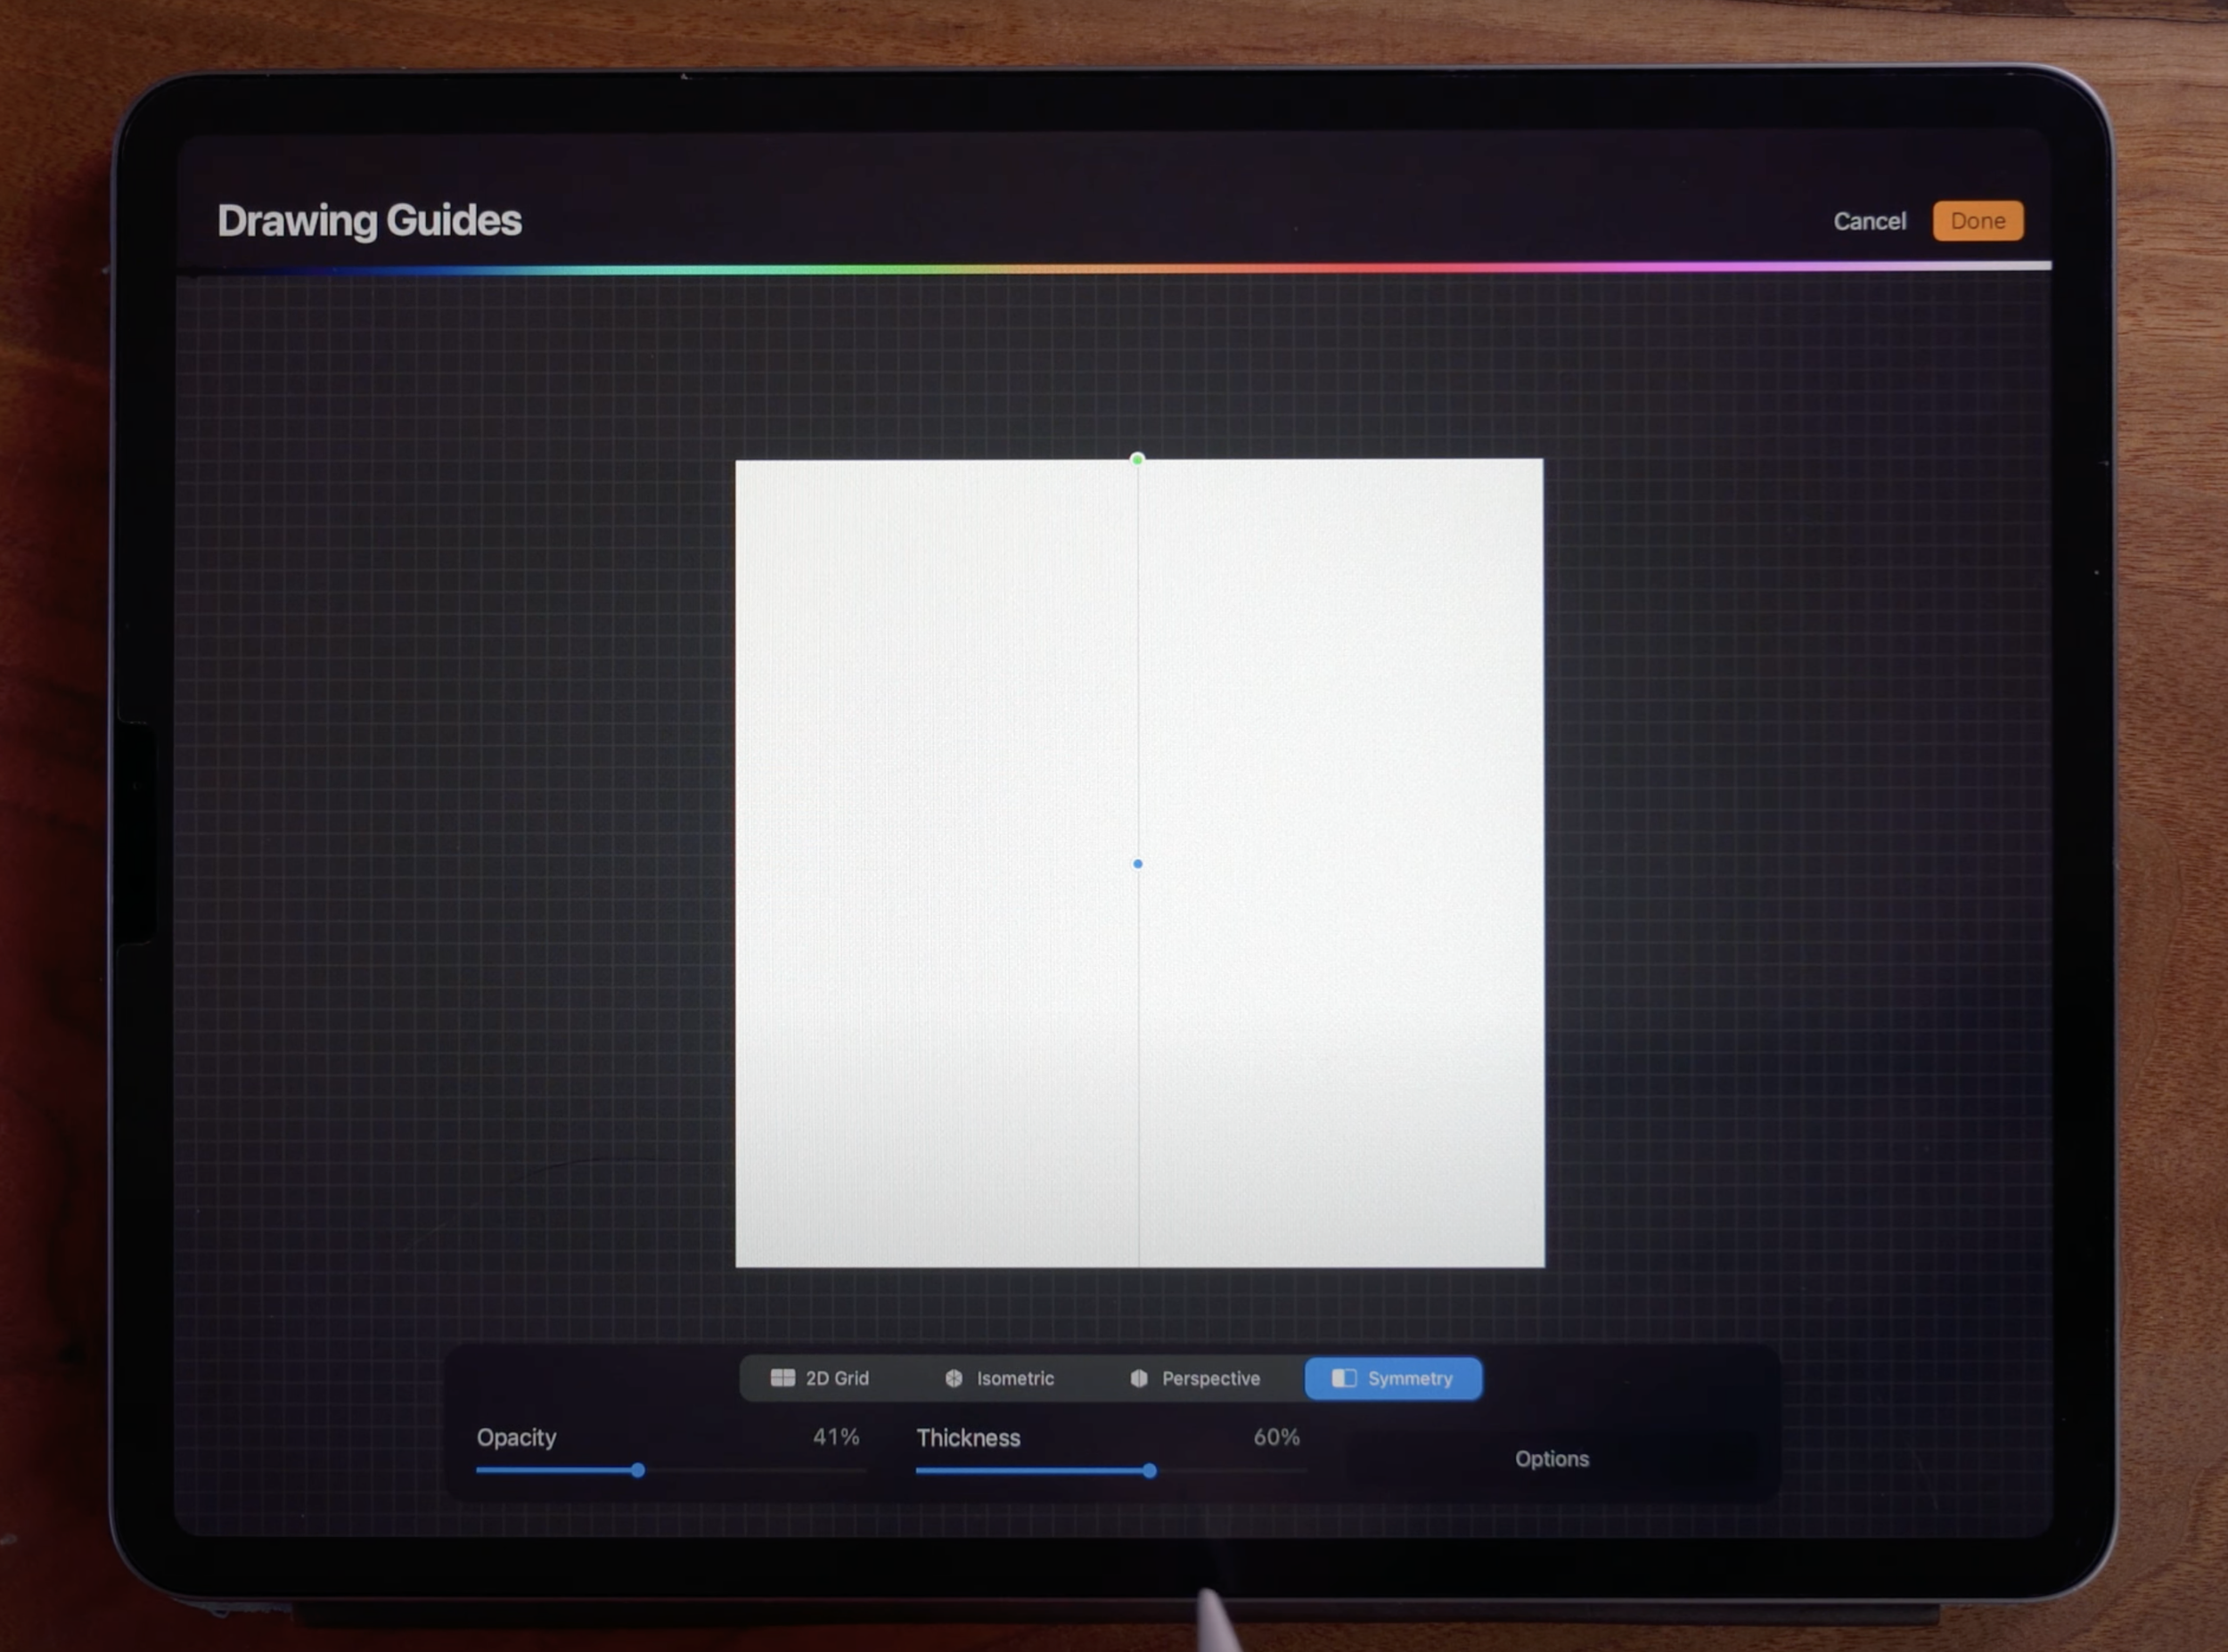
Start with a 3000 x 3000 pixel canvas with 300dpi. Under the wrench icon, tap “Canvas” and then toggle on “Drawing Guide”. Then tap “Edit Drawing Guides” and select Symmetry. Tap Done to go back to the canvas.
We’re only going to use Symmetry on the first layer. In the layers panel, add a couple new, empty, unassisted layers above the first Assisted layer.
We’ll draw our “sketch” on the assisted layer, using the Studio Pen from the Inking panel.
Sketch
Start by drawing the neck along the symmetry line. When drawing the neckline curves, make sure that when the lines meet at the symmetry line, they connect smoothly - they should be pretty much perpendicular to the symmetry line when they meet. This ensures a smooth neck curve.
Draw front and back neck trim.
Continue drawing the sweater body - sloping lines for the shoulder, a long extended curve for the armhole, and then the sides of the sweater and the bottom rib trim shape.
It’s totally okay if it looks a little wonky - we’re going to make adjustments with liquify after this to perfect the proportions. Feel free to erase and redraw as you go, too.
Draw the sleeves so that they are tucked somewhat under the body of the sweater. At the cuffs, the rib trim should be narrower than the rest of the sleeve.
In the demo, you can see, the proportions definitely look weird on my sweater. The shoulders are much too broad. Let’s fix that next.
Adjusting with Liquify
Tap the wand icon to open the adjustments menu. Select Liquify, and set the tool to Push. Now use this to adjust and nudge the sketch around until you’re happy with the proportions. Adjust the brush size as needed - smaller for more precise movements, and larger to move more of the sweater at once.
Liquify works with Symmetry, so you only need to make the adjustments to one side.
Clean Linework
In the layers panel, decrease the layer opacity of the sketch to around 30%. Then select an empty, unassisted layer above. Use the Studio Pen to draw in your clean linework, using fluid motions to create smooth lines.
Drawing details
Select an empty layer above the linework layer. With the Studio Pen, decrease brush size, and draw in evenly spaced lines to indicate ribbing at the neck trim, bottom hem, and cuffs. Add swoosh lines at the armholes to indicate folds or wrinkles. You can also draw in small visible stitch decreases at either side of the armholes.
Using Reference in Procreate
Open the layers panel, and tap on the cleaned up Linework layer to bring up the side menu. Tap Reference. This will allow us to use Automatic Selection on other layers while referencing this layer’s linework.
Sweater Pattern Fill
Add a new layer below the Details layer. Before filling the sweater pattern, make sure the canvas direction is aligned with the grain of the body of the sweater. These brushes work so that the pattern is aligned with the ipad screen direction, so when you rotate or tilt your canvas, the pattern will always be oriented to the screen, not the canvas. Use the Variegated Stockinette brush set to the smaller size point to fill the entire sweater body (it’s ok to go outside the lines).
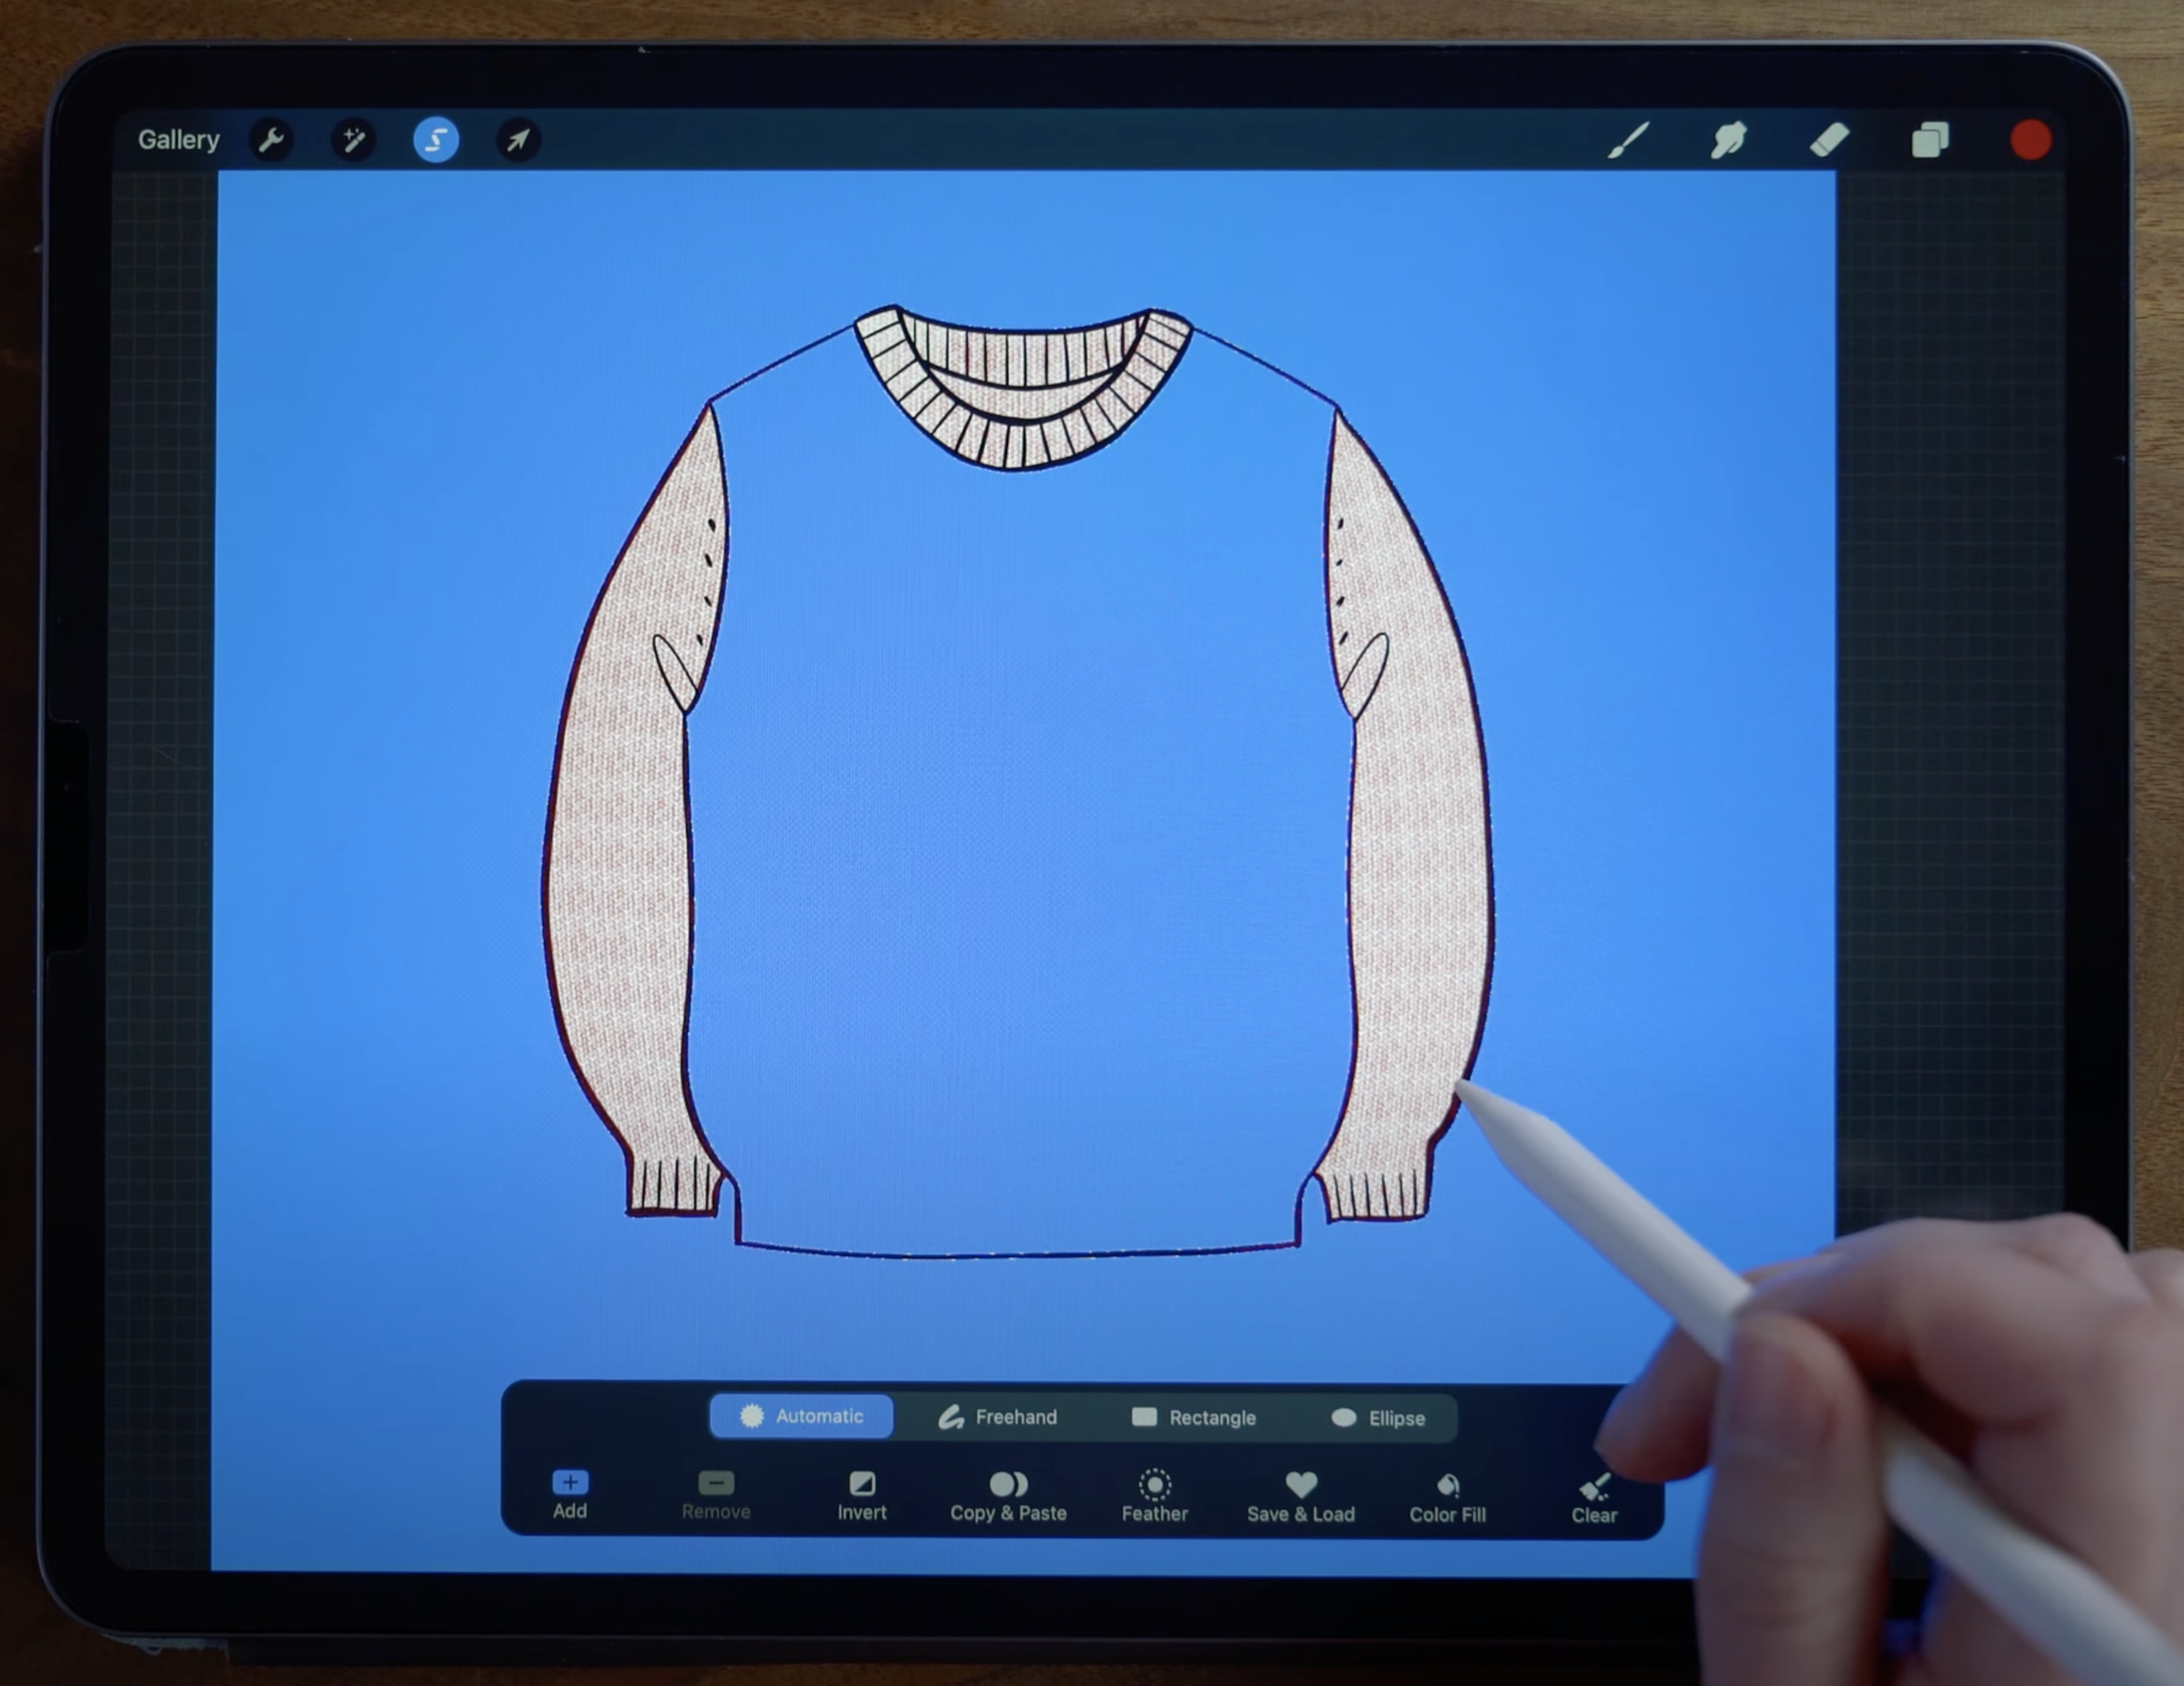
Tap the Selection tool, and then set it to Automatic, and make sure that Color Fill is turned off. Then touch the pencil to the screen in the area outside of the sweater, to select the negative space. Slide the pencil to the left or right to adjust the selection threshold. Tap to also select both sleeves, and then select the linework, too. By using Reference, we’re able to work directly on this sweater fill layer while using the selection reference of the Linework layer.
Now, use three fingers to scrub back and forth to clear the selection. Alternatively, you can swipe three fingers down to bring up the cut/copy/paste menu, and tap cut.
On a new layer above the sweater body fill layer, fill one sleeve with the sweater knit pattern. This time, go well outside the lines so you have a lot of margin on all sides, as pictured.
Now, tap the Transform tool, and set it to Warp. Pull the blue nodes, and the mesh grid itself, to adjust the pattern to follow the curve of the sleeve. Try to keep any distortion minimal - I try to keep the curve a consistent width from top to bottom to limit the stretching/squishing of the pattern.
Add a new layer, and repeat these steps for the other sleeve.
With both sleeves filled and warped, open the layers panel, and pinch to merge the two sleeve layers together.
On the newly merged layer, tap the Selection tool, set to Automatic, and tap to select the space outside the sweater, the sweater body, and the linework.
Use the three finger scrub motion to clear the selected contents from the layer.
Sweater Knit Lettering
Next, we’re going to write the words “To:” and “From:” in knit stitches. On a new layer above the pattern fill layers, set the blend mode to Multiply. With the Single Wale Brush set on the smaller saved size point, draw a line to form the letter T, keeping the pencil touched to the screen until it snaps into a Quick Shape Line.
Tap the “Line” button on the bar that appears at the top of the screen.
Now in the Quick Shape editing mode, use the blue nodes to stretch or squish the stitches so they match the pattern underneath. Drag the line itself to reposition, and pull the blue nodes to adjust the angle.
To draw a second line the exact same length as the first, I find it easiest to draw directly on top of the first line. Again, hold til it snaps into a QuickShape, then tap Line to edit, and then you can reposition the line right next to the first.
To draw the horizontal top part of the T, use the Single Stitch Stamp brush. While this brush works great for drawing one stitch at a time, it can also be used to draw a horizontal row of stitches using the same QuickShape edit process as we used with the vertical lines.
Next, to draw the lowercase O, draw a line that starts midway down the T and ends one stitch from the bottom.
Continue to create the O, maintaining a double stitch thickness for the sides. Use a short line of two stitches for the top and bottom of the O, staggering them so they sit one stitch higher and lower than the sides of the O. This should also now make your T and O aligned on the bottom baseline.
Use the Single Stitch Stamp brush to create a colon next to the O.
As a shortcut, we’re going to use part of the T we drew to create the letter F. Use the selection tool, set to Freehand Select, to draw a selection around just the letter T. On the bottom selection toolbar, tap Copy & Paste. This will paste a duplicate T on a new layer. Use the Transform tool to move the new T down, aligning it as pictured here.
Use the eraser tool to remove the four stitches on the left side of the T. Now, use the Single Wale Brush to extend the top horizontal bar of the F one more wale (column).
Move a couple stitches down further, and draw two lines of two stitches each to create the lower bar of the F. Continue using the Quick Shape Edit function to adjust the placement of each line.
Position the lowercase R to align at the baseline with the F. Maintain the double thickness for the vertical lines of the letter. Stagger the top bar of the “r” to be one stitch lower than the top of the side lines.
Move back to the first lettering layer, and use Freehand Select to draw a selection around the letter O. Tap Copy and Paste, and then on the new O layer, use the transform tool to move it down and position it next to the letter R.
Now draw the letter M, working one line at a time, and using QuickShape to edit the position of the stitches.
If you ever draw one stitch too many, you can still align the stitches and use the line, just zoom in and erase the extra stitch after it is in its proper position, after you have exited the QuickShape edit mode.
Add a colon after the M with the Single Stitch Stamp brush. In the layers panel, pinch to merge all the lettering layers together. The newly merged layer should still be set to Multiply.
Bonus Step #1
To add a circle for a hole punch and string, go to the Details layer, and select the Studio Pen. Draw a circle, and keep the pencil touching the screen, letting it snap into a QuickShape. While still holding the pencil, tap a finger anywhere on the screen to create a perfect circle.
Bonus Step #2
Punch up the color a bit by adding watercolor! On an empty layer set to Multiply, grab a watercolor brush (I used the Soft Build Watercolor from this set). Slowly build up shading and extra color, especially along the sleeves, the bottom trim, cuffs, and the back neckline. This gives a nice, painterly look to the tag.
Bonus Step #3
Use the brushes from the Cut Out set (they’re free, linked at the top of this post) to create a dashed outline around the sweater, leaving a gap at the beginning and end. Then on a new layer, stamp once with the Scissors Icon brush, and then use the Transform tool to position and scale the scissors to fit in the gap in the dashed line.
Export the file (under the wrench icon, tap Share) as a PNG or JPG. Then print, cut out, and tie or tape to your gifts!
Thanks for painting along with me! If you share your lovely work, be sure to tag me (@woolypronto) so I can see!
Start painting now, or pin this project for later!
Get FREE Procreate Palettes in Your Inbox:
JOIN THE newsletter fam:
When you join, you'll gain access to dozens of Procreate freebies: brushes, paper textures, workbooks, and my entire library of color palettes. I send out updates each week with my best tips and tricks, and you'll be the first to hear when new freebies are released!
