How To Draw Dimensional Leaves
As I'm learning to draw, I've found I have to adjust how I think about the world to translate it to paper. It's still very much a process, with so many facets: form, dimension, lighting perspective - it can be overwhelming if you are teaching yourself. Leaves are a great place to start this exercise because they aren't overly complex. You can watch the video, or follow along the images below for a step-by-step guide!
Step 1:
Draw the midrib - this is the center vein of the leaf. Try to keep your lines continuous and flowing.
Step 2:
Draw the margin (the edge) of the leaf. This line will follow the same curve as the midrib.
Start at the same point as before, but add some distance from the first line, to give the leaf some width. Be sure to meet the midrib back again at the end point.
Step 3:
Draw the other margin of the leaf, and be sure to close up the base and tip of the leaf if your lines didn't naturally meet.
Step 4:
Clarify the perspective. You're the artist, so you get to decide!
Which edge of the leaf is near, and which is further away? Which is the underside? What is in shade, and what is in light?
Be sure to decide this, and then keep it straight for yourself as you proceed.
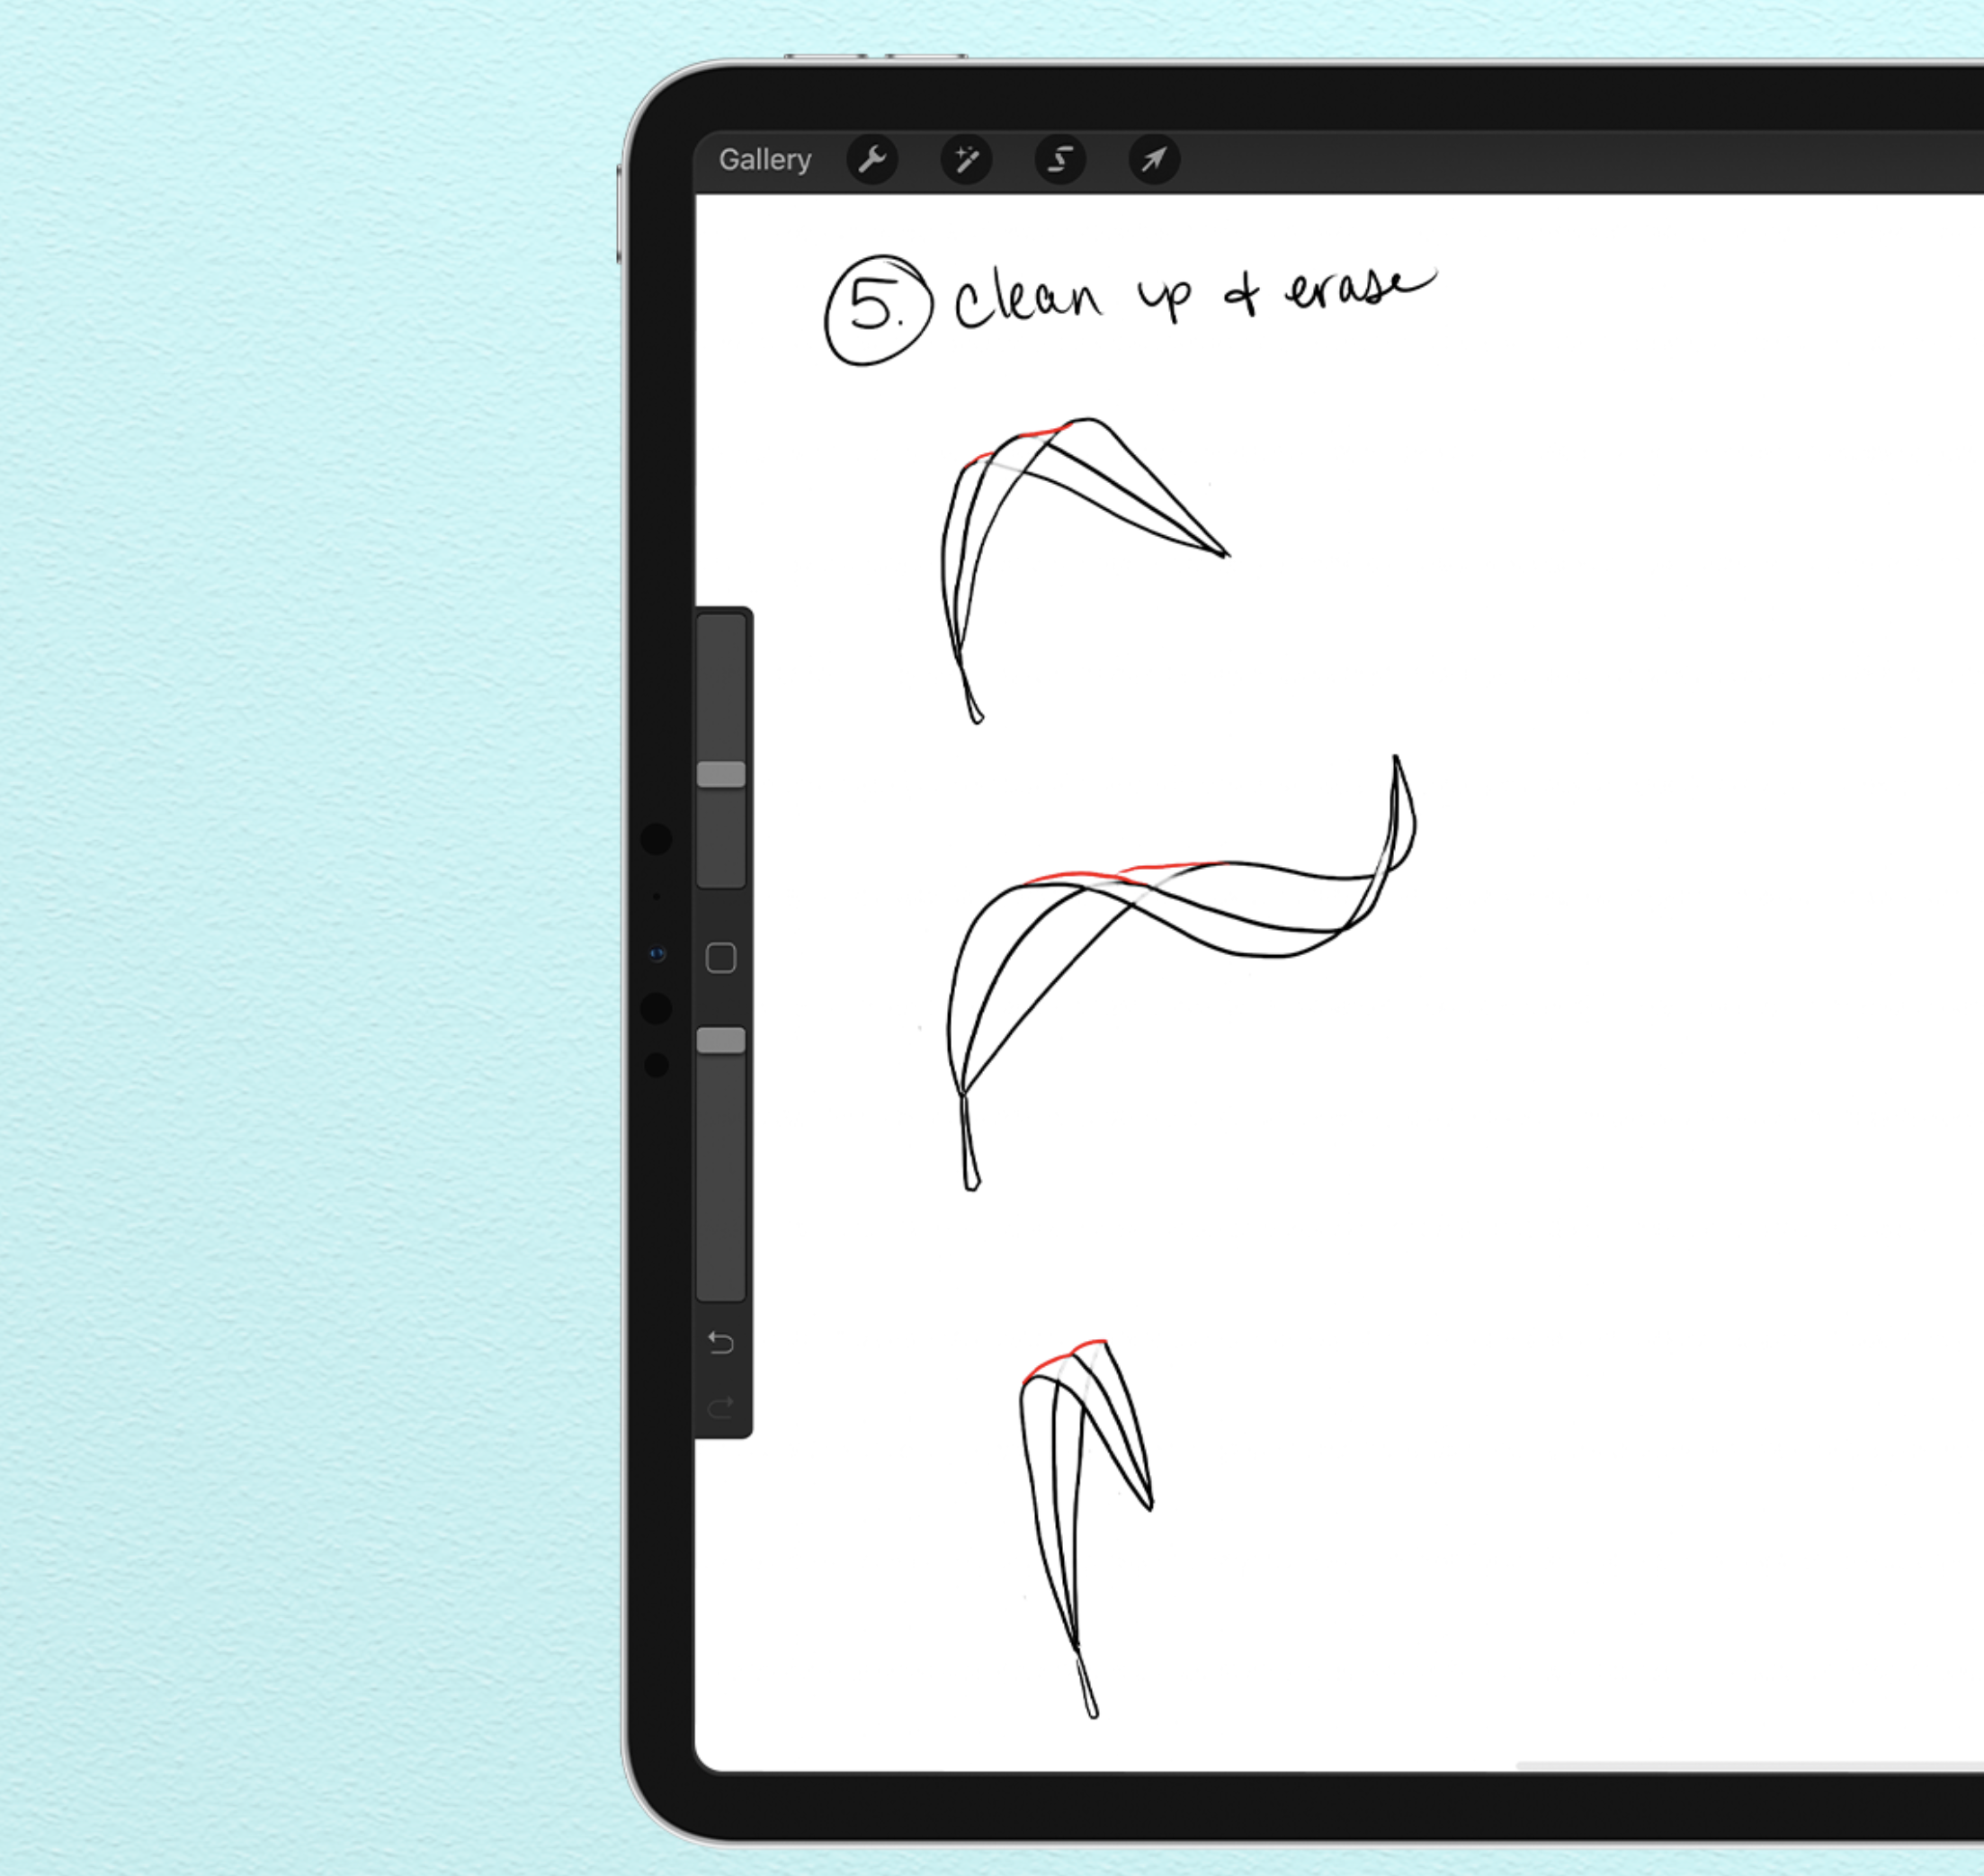
Step 5:
Erase the lines you wouldn't see - since the leaf isn't transparent. Then, clean up the lines and edges as needed.
Finish it up
Once you've drawn the form, you can really go all out making it your own, adding detail, shade, and complexity.
You can also use this base that you’ve created as a template, tracing over it on a new layer with more detailed brushes and colors.
Want more step-by-step guides for Procreate?
JOIN THE PACK!
When you join, you'll gain access to dozens of Procreate freebies: brushes, paper textures, workbooks, and color palettes. I send out weekly updates with my best tips and tricks, and you'll be the first to hear when new freebies are released!


